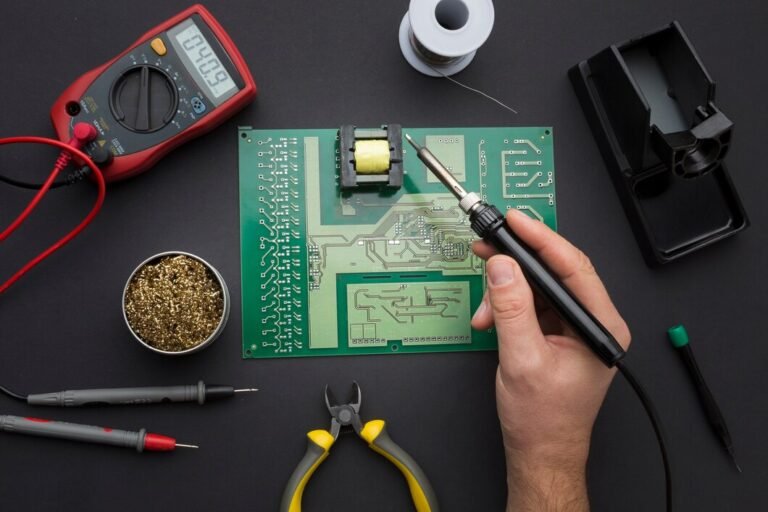
Soldering the AOS 3.5 GEP-F722 flight controller is one of those DIY projects that can seem daunting but is totally manageable with the right guidance. Whether you’re a drone enthusiast or someone diving into FPV (First Person View) builds for the first time, this guide will help you nail the process. Let’s walk through everything you need to know to confidently solder your GEP-F722 for your AOS 3.5 drone frame!
What’s the AOS 3.5 GEP-F722 and Why Does It Matter?
The AOS 3.5 frame paired with the GEP-F722 flight controller is a popular combination among FPV drone builders. The AOS 3.5 frame is known for its lightweight, durability, and stability, while the GEP-F722 flight controller provides incredible processing power, multiple UARTs, and compatibility with advanced firmware like Betaflight.
However, soldering the GEP-F722 onto your AOS 3.5 can be tricky if you’re new to the world of drone DIYs. Don’t worry—this guide has you covered with step-by-step instructions, tips, and tricks to make the process as smooth as possible.
Tools You’ll Need for Soldering the AOS 3.5 GEP-F722
Before jumping into the actual soldering, gather these tools and materials:
- Soldering Iron (preferably temperature-controlled, 40-60 watts)
- Lead-Free Solder (or 60/40 rosin-core solder for beginners)
- Flux Paste (to ensure clean solder joints)
- Wire Strippers (to prep your wires)
- Helping Hands (to hold small components in place)
- Multimeter (to check continuity)
- Heat Shrink Tubing (for insulation)
- Small Tweezers (for precision work)
Pro Tip: Always work in a well-ventilated space, as solder fumes can be harmful over time.
Step-by-Step Guide to Soldering Your AOS 3.5 GEP-F722
1. Prepare Your Workspace
Clear a clean, organized space to work. Lay out your tools within arm’s reach and ensure your soldering iron is preheated to the correct temperature (around 350°C for most lead-free solder).
2. Tin the Pads
“Tinning” means adding a small amount of solder to the pads on your GEP-F722 flight controller. This step makes it easier to attach wires later.
- Hold your soldering iron to each pad for a second.
- Apply a small amount of solder until it forms a shiny, rounded bump.
3. Prep the Wires
Strip about 2–3mm of insulation from the ends of your wires. Apply a bit of flux and tin the wires by touching them with the soldering iron and a bit of solder. The result should be a smooth, silver coating.
4. Solder the Wires to the Pads
Carefully align the tinned wire ends with the corresponding pads on the GEP-F722. Use tweezers to hold the wire in place while you briefly touch the soldering iron to fuse them together.
Key Tips:
- Be quick but precise to avoid overheating the flight controller.
- Double-check that each wire is connected to the correct pad using your GEP-F722 wiring diagram.
5. Inspect Your Work
After soldering all wires, visually inspect the connections for cold solder joints (dull, grainy appearance). Use your multimeter to confirm that there are no shorts between adjacent pads.
6. Install on the AOS 3.5 Frame
Once soldering is complete, mount the GEP-F722 onto your AOS 3.5 frame using the included standoffs and screws. Ensure all components fit snugly without pinching any wires.
Troubleshooting Common Soldering Issues
- Cold Solder Joints: Reapply heat and add a small amount of flux to fix dull or cracked joints.
- Solder Bridges: If solder spills onto adjacent pads, use desoldering braid to remove the excess.
- Overheating Pads: Limit your soldering time to 2–3 seconds per pad to prevent lifting them off the PCB.
Why Proper Soldering Matters for the AOS 3.5 GEP-F722
Soldering might seem tedious, but it’s crucial for the stability and performance of your drone. Poor soldering can lead to loose connections, signal issues, or even flight controller failure. By following these steps, you’re setting up your AOS 3.5 for optimal performance and longevity.
FAQs About Soldering the AOS 3.5 GEP-F722
1. Do I need a fancy soldering iron for this project?
Not necessarily. A basic 40–60W soldering iron with a fine tip will do the job. However, a temperature-controlled iron is highly recommended for better control.
2. How do I know if I’ve soldered correctly?
A good solder joint should look smooth, shiny, and slightly cone-shaped. Use a multimeter to check for proper continuity between the components.
3. What’s the best type of solder to use?
For beginners, 60/40 rosin-core solder is easier to work with, but lead-free solder is more environmentally friendly and safer for long-term use.
4. Can I reuse the AOS 3.5 frame if I mess up soldering?
Yes! If you make a mistake, you can desolder the connections and try again. The frame itself isn’t affected by soldering errors.
5. What should I do if I see smoke while soldering?
A little smoke from the flux is normal, but make sure to work in a ventilated area or use a fume extractor for safety.
6. Can I practice soldering before working on the GEP-F722?
Absolutely! Practice soldering on spare wires or an old circuit board to build confidence.
Conclusion
Soldering the AOS 3.5 GEP-F722 may seem intimidating at first, but with the right tools, patience, and this step-by-step guide, you’ll be ready to fly in no time. A well-soldered flight controller ensures better performance, durability, and the satisfaction of knowing you built it yourself. Happy soldering, and enjoy your AOS 3.5 build!

